


Introduction
Publish/Subscribe is a messaging pattern in which the subscribers can subscribe to any number of topics (aka channels) and they would be notified when a message has been published in one of those topics.
Pub/Sub is like the popular friend who would get to know whenever any event happens and the services/applications subscribing are like the friend who asks the popular friend to let him/her know, whenever some specific event happens.
Example
Assume you are developing application for a food delivery company. You want to send some information related to the order via an email and a SMS to the user after they have made their purchase. In a micro-services kind of architecture, you would have to contact the services responsible for sending email and SMS programmatically from the service responsible for transaction of the order.
That's not a big deal, right? But what if you want to add more services reacting to the same event (order made in this case) or add more triggers to that event. Then whatever service which is causing the event should be responsible for calling all the service that should be triggered (Now, it has more than one responsibility). As you develop, the application code base/architecture gets complicated pretty soon.
Now, lets add Pub/Sub into the mix and see how it changes our current situation.

When an order is being made, order details can be published to the "order" topic and services which should get notified (taken care by the Pub/Sub system) when an order is being made, such as email service, SMS service can be made to subscribe to the "order" topic.
Now, whenever an order is made, you just have to publish the order details to the "order" topic and the services subscribed to it would get notified!
Adding Pub/Sub system for smaller systems may seem like a overkill but for large scale systems its pays off.
Yay! using Pub/Sub we just decoupled the services, which makes it easy to develop, deploy and maintain the application. 🚀
Message Filtering
The Pub/Sub system we saw earlier is called topic based message filtering. The subscribers can also made to subscribe based on the content of the message, called content-based. There can also exist a hybrid of both variant.
Why Publish - Subscribe Pattern?
Publish/Subscribe (Pub/Sub) messaging helps decouple application services in distributed systems, making it easier to develop, deploy and maintain applications.
It allows messages to be broadcast to different parts of the distributed system asynchronously.
Demonstration
It's demo time!

We'll be using Redis as our pub/sub system and Nodejs for building REST API and scripting. So if you are going to be following along, make sure that you have installed Nodejs and Redis.
You can find the code used in this article here.
Make a directory for the project.
mkdir pubsub-demo
Initialize a empty npm project.
npm init -y
We need a redis driver to be able to communicate with the redis daemon. So let's install one. Also let's install express to make the REST API.
npm install redis express
Let's create the following folder structure
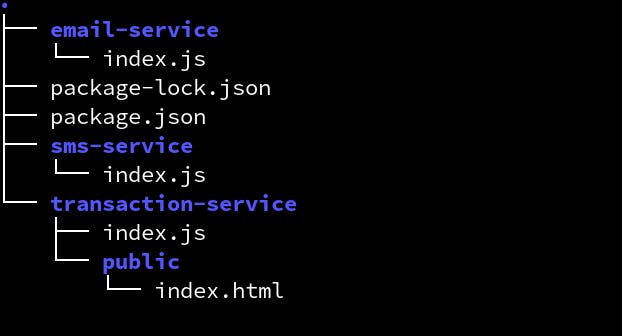
mkdir -p transaction-service/public email-service sms-service && touch {email-service,transaction-service,sms-service}/index.js
With initial setup done, let's start coding!
Add these contents to transaction-service/public/index.html
<!DOCTYPE html>
<html lang="en">

<head>
    <meta charset="UTF-8">
    <meta http-equiv="X-UA-Compatible" content="IE=edge">
    <meta name="viewport" content="width=device-width, initial-scale=1.0">
    <title>Food Delivery</title>
    <link href="https://cdn.jsdelivr.net/npm/bootstrap@5.0.2/dist/css/bootstrap.min.css" rel="stylesheet"
        integrity="sha384-EVSTQN3/azprG1Anm3QDgpJLIm9Nao0Yz1ztcQTwFspd3yD65VohhpuuCOmLASjC" crossorigin="anonymous">

</head>

<body class="container mt-4">
    <h1 class="mb-5 text-center">Food Details</h1>
    <form method="POST" class="shadow rounded p-5" action="/order">
        <div class="mb-3">
            <label for="phoneNo" class="form-label">Phone No.</label>
            <input id="phoneNo" name="phoneNo" class="form-control" required type="number" placeholder="Eg. 9123456789" />
        </div>
        <div class="mb-3">
            <label for="email" class="form-label">Email</label>
            <input id="email"name="email" class="form-control" required type="email" placeholder="Eg. example@example.com" />
        </div>
        <div class="mb-3">
            <label for="food" class="form-label">Food Name</label>
            <input id="food" name="foodName" class="form-control" required type="text" placeholder="Eg. Pizza" />
        </div>
        <button type="submit" class="btn btn-primary">Submit</button>
    </form>
</body>
</html>
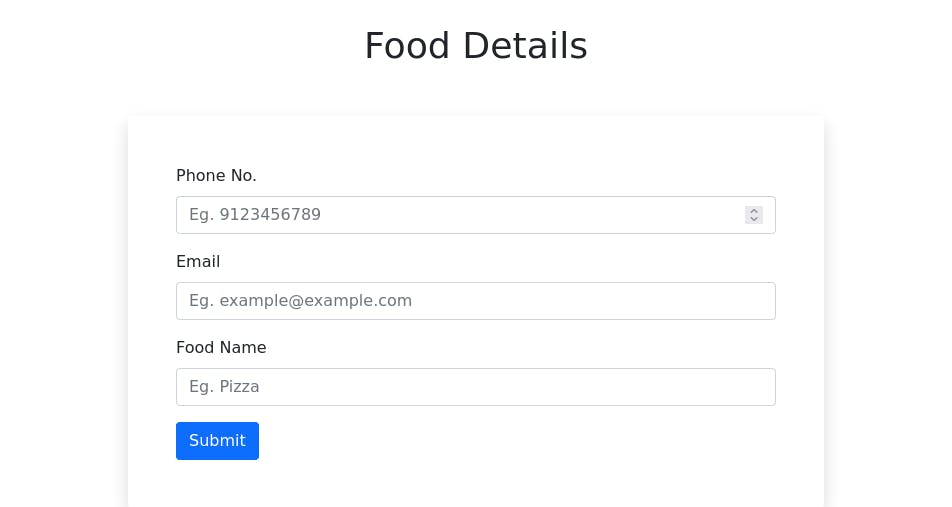
We have a basic form for getting basic food delivery details - email, Phone No. and the name of the food they want to order.
On submit, the browser makes an http POST request to the server at the endpoint /order.
Now let's add code to transaction-service/index.js
const express = require('express');

// Serve files from transaction-service/public
app.use(express.static(__dirname + '/public'));

app.listen(3000, () => {
  console.log('Listening on port 3000');
});
Spin up the server by,
node transaction-service
You will see index.html served at localhost:3000.
If you have clash with port, try incrementing it, till you don't have a port clash.
Let's add a new route handler for /orders route.
app.post('/order', (req, res) => {

    res.send(200)
})
Now, We have to extract the form data from the request. Let's install a library which makes this process very easy.
npm install express-formidable
Use the express middleware.
app.use(formidable())
Now that we use this middleware, we can extract the form data using the fields property of the request parameter.
 app.post('/order', (req, res) => {
 // extract the form data from the request
  const  { phoneNo, email, foodName } = req.fields;
  // TODO publish order topic to Pub/Sub
   res.send(200)
})
It is always important to check the validity of input data, but we are skipping it, because it's not the scope of the article.
Let's create a redis client to be able to communicate with the redis instance.
const redis = require('redis'); // import redis driver

// create an instance of redis client
const redisClient = redis.createClient();
By default the redis driver tries connecting to the redis running locally at port 6379.
Checkout the config options for redis driver here for configuring it.
Publishing to a topic in redis is done like
redisClient.publish(topic, message, callback);
The message parameter has to be of type string. So, you have to serialize the data you want to transmit.
const topic = 'order';

// serializing javascript object to JSON string
const message = JSON.stringyfy({  phoneNo, email, foodName });

redisClient.publish(topic, message, (err, n) => {
   // work done after publishing
});
Integrating with existing code
app.post('/order', (req, res) => {
  const  { phoneNo, email, foodName } = req.fields;

  const orderDetails = { phoneNo, email, foodName };

  const topic = 'order';
  const message = JSON.stringify(orderDetails);

    redisClient.publish(topic, message, (err, _) => {
        console.log(`Published order details to "order" topic`)

        if (err) {
            console.error(err);
            res.sendStatus(500);
        }

        res.status(200).send(`Order Successful!`)
    });

});
Let's add an unique Id to the order details which helps us differentiate orders. For that install nanoid.
npm install nanoid
const { nanoid } = require('nanoid');
add Id field to orderDetails.
const Id = nanoid();
const orderDetails = { phoneNo, email, foodName, Id };
Putting it all together.
// transaction-service/index.js
const express = require('express');
const formidable = require('express-formidable');
const { nanoid } = require('nanoid');
const redis = require('redis');
const app = express();
app.use(express.static(__dirname + '/public'));
app.use(formidable())
const redisClient = redis.createClient();
app.post('/order', (req, res) => {
const { phoneNo, email, foodName } = req.fields;
const Id = nanoid();
const orderDetails = { phoneNo, email, foodName, Id };
const topic = 'order';
const message = JSON.stringify(orderDetails);
redisClient.publish(topic, message, (err, _) => {
console.log(`Published order details to "order" topic`)
if (err) {
console.error(err);
res.sendStatus(500);
}
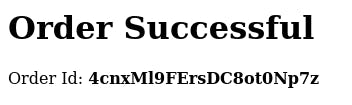
res.status(200).send(`<h1>Order Successful</h1> Order Id: <strong>${Id}</strong>`)
});
})
app.listen(3000, () => {
console.log('Listening on port 3000');
});
Now that we have an service which publishes to redis. Let's add two services which subscribes to the same topic, "order". Don't worry, it's going to be short!
You can subscribe to a topics in redis by,
const topic = 'order';
redisClient.subscribe(topic);
redis client has an event listener "message", which gets triggered whenever something has been published to one of the subscribed channels(topics).
redisClient.on("message", function (channel, message) {
   // Do whatever you want to do on an publish.
});
If you are subscribing to more than one topic(channel), you might want to do action based on the value of parameter channel. Since we're subscribing to only one topic(channel), we would always get 'order' as value for the parameter channel.
Add the following content to email-service/index.js.
const redis = require('redis');


const redisClient = redis.createClient();

redisClient.on("message", function (channel, message) {
    const payload = JSON.parse(message);

    const { Id, email } = payload;

    // Send email

    console.log(`[Email Sevice] Order details sent to ${email}. via email for Order ${Id}`)
})

redisClient.subscribe('order')
Add the following content to sms-service/index.js.
const redis = require('redis');

const redisClient = redis.createClient();

redisClient.on("message", function (channel, message) {
    const payload = JSON.parse(message);

    const { phoneNo, Id } = payload;

    // Send sms

    console.log(`[SMS Sevice] Order Details sent to ${phoneNo} via SMS for Order ${Id}`)
})

redisClient.subscribe('order')
Let's spin up the service. You can run the three services in three different terminal using node like,
node transaction-service
and similarly for the other two services.
If you are on Mac/Linux, you can do the following to run all three services in a single terminal.
node transaction-service & node email-service & node sms-service
Let's see our work in action!
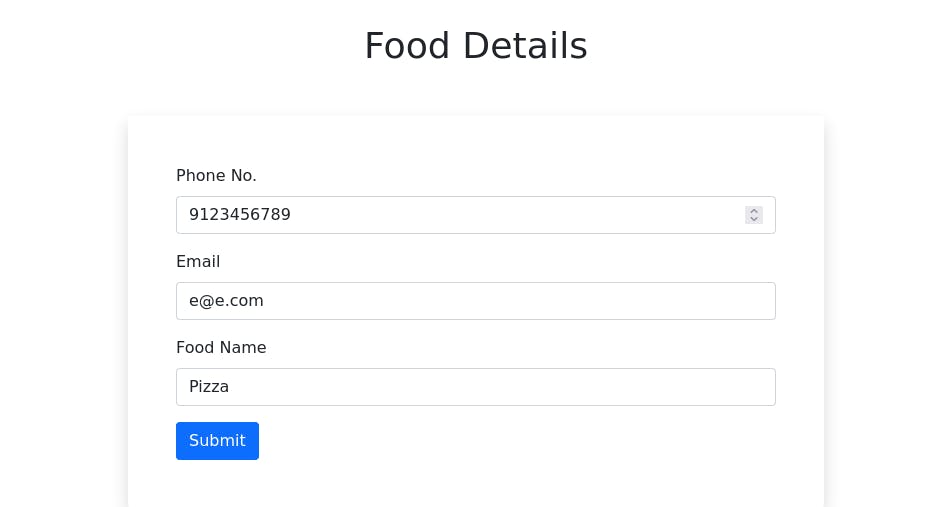
After submitting.
Now let's see the logs.

It works!
You would get logs separately if you had spun up 3 different terminals.
If you have followed along till this, then congrats! 🎉 you made it to the end.
Follow me to get notified when I publish articles like this. 😉
References
credits of the cover image to aws.amazon.com/pub-sub-messaging